

Vapour Barrier Basement
Sealed from the gravel up.
Every vapour barrier basement detail used to start at the bottom plate. Under the 2024 Ontario Building Code it starts on the gravel, and in Springwater the first person to look at it is the building inspector, before a single truck of concrete shows up.
That changes the order of the job more than it changes the materials. The poly is the same 6 mil sheet. What’s new is that the basement is now treated as one continuous barrier from under the slab, up the walls and across the header, and every place two trades meet is a place it can break.
The vapour barrier basement inspection that now happens on gravel
Springwater’s Building a House guide lists the new requirement under Article 9.13.4.3, rough-in for a subfloor depressurization system. Three items: a 4-inch pipe through the floor, an air barrier below the slab (6 mil poly vapour barrier or an alternative), and all penetrations and joints sealed. Then it adds an inspection most crews haven’t had to book before. The radon rough: the inspector checks the air barrier before the concrete pour, for continuity and for sealed penetrations.
The guide is clear that your required inspections are the ones printed on your permit card, so read that first. But if the card lists a radon rough, the sheet under your slab is now an inspected item with the same standing as the vapour barrier on your walls.
Other Simcoe County municipalities have published the same requirement with more of the detail filled in:
- Clearview’s radon and soil gas guide (revised June 2026) calls for 6 mil polyethylene under the basement slab, lapped at least 300 mm per Figures SB-9A or SB-9B of Supplementary Standard SB-9, with the slab perimeter and every penetration sealed with flexible sealant such as polyurethane caulking, under Clause 9.13.4.2.(4)(a). It lists a 75 mm, 25 MPa slab without poly as an alternative.
- Collingwood’s 2024 code info sheet asks for an air barrier conforming to CAN/ULC-S742, giving 6 mil poly to CAN/CGSB-51.34-M as the example, run the full extent of the floor with all edges and penetrations sealed, and joints in a flexible sheet sealed with tape or flexible sealant. It names the penetrations: floor drain, shower drain, sump pit, sewage pit, stack.
Lapped 300 mm in one document, taped in the other. The way to pass either is to do both, and to ask your own building department which one their inspector is looking for before the poly goes down.
Under the slab, the poly is an air barrier first
Call it a vapour barrier on site if you like, but the code is asking it to stop air. Collingwood’s sheet calls the under-slab poly an air barrier and ties it to Subsection 9.25.3 and SB-9. The 2024 wording of 9.25.3.1, as Markham’s Builder Tip No. 21 reproduces it, now includes minimizing the ingress of soil gas in what the air barrier system is for, and says its continuity shall extend throughout the basement.
That’s why the detail that matters in a vapour barrier basement is continuity, not thickness. The National Building Code’s intent note on lapping soil gas barriers under a slab says the concrete weighs down and clamps the joints, and that the point is to limit the chance of a discontinuity that lets soil gas, particularly radon, into the house. A sheet with a boot-sized tear near the sump pit has failed the job, however thick it is.
Not everyone agrees the requirement was needed. RESCON’s Dave Henderson argued in July 2026 that the poly’s main use is making future radon mitigation easier, and that many Ontario houses built without it still meet tough airtightness targets. That’s a fair debate for the code committee. On your site the question is simpler: the inspector checks it before the pour, and a fail costs a day of the concrete crew.
What usually breaks it:
- Penetrations sealed in the wrong order. Drains, the stack, the sump and the radon pipe itself all come through the sheet. Get the under-slab plumbing roughed in first, then the poly, then seal every one.
- Foot traffic. Clearview’s guide warns that 6 mil poly is prone to puncture and has to be protected. Mesh, chairs and the pour crew’s boots do the damage after the inspection, so walk it again the morning of the pour.
- The edge. A sheet cut short of the footing leaves a gap the slab can’t clamp.
Where the slab meets the wall
The perimeter joint is the hand-off between the floor barrier and the wall barrier, and it belongs to nobody unless somebody is named. Clearview’s guide treats the outside of the foundation wall as part of the same soil gas barrier, with bituminous dampproofing under Sentence 9.13.4.2.(3), and the joint between the slab and the wall sealed with flexible sealant.
So the concrete trade owns the sealant at the slab edge. By the time the insulation crew arrives the slab is poured, and nothing an insulator does to the inside of the wall can fix a perimeter that was never sealed. Put it on the schedule as a line item and look at it before the framers start the basement walls.
On the walls: one vapour barrier, on the warm side
The basement wall is the one assembly where the cold side is wet. Concrete in soil holds water and gives it back to whatever is fastened to it. Article 9.13.2.5, as Markham’s Builder Tip No. 2 reproduces it from the 2024 code, requires moisture protection on the inside face of a below-grade wall wherever an interior finish is applied or wood members touch the concrete for insulation or finish. A bottom plate on the concrete triggers it.
Above grade, nothing low-perm against the concrete
Where that protection is a membrane or coating, Sentence (2) runs it from the floor up to the top of the insulation or finish, but no higher than exterior finished ground. Above grade, nothing with a permeance below 170 ng/(Pa·s·m²) goes between the insulation and the wall. Markham’s tip adds that building paper is the common moisture barrier and isn’t needed above grade, so the wall can breathe. It also advises giving new concrete adequate time to cure before covering it.
The wall that fails this is familiar: poly stapled to the concrete full height, a stud wall, batt, then a second sheet of poly on the warm side. The batt ends up between two vapour-tight layers and the above-grade strip can’t dry. The vapour barrier goes on the warm side of the stud wall, once. The R-value side of these walls, SB-12’s continuous insulation line and the assemblies that meet it, is in insulating basement walls.
Vapour barrier basement transitions at the header
The wall poly stops at the top plate. The floor above is a header, a rim joist and a sill plate sitting on the concrete, and it’s where the basement barrier most often has a gap. Builder Tip No. 21 calls the junction at the foundation and the floor header a major source of air leakage. Where a header wrap is the air barrier, Sentence 9.25.3.3.(5.1) has it sealed or lapped to the wall air barrier above and below, with seams at the corners sealed with acoustical sealant or approved sheathing tape.
That’s fiddly with sheet goods: joist after joist, each bay with its own six edges. Our spray foam page calls the rim joist one of the biggest single air leaks in a Canadian house, and lists header spaces in the basement as the gaps that are almost never sealed properly. Foam in each bay bonds to the rim, the sill and the joists, so the bay is closed from the inside rather than taped. The rim joist post has the detail.
Interior walls and the basement ceiling
9.25.3.1 asks for the air barrier in assemblies that separate conditioned space from unconditioned space or from the ground. A partition between two heated basement rooms, or the floor between a heated basement and the main floor, does neither, and has no cold side for moisture to condense on. Batt in those spots is for sound, which our batt page lists as the reason to insulate interior partitions. Poly there adds a step and protects nothing. The exception is a basement or crawl space that stays unheated: then the floor above becomes the boundary and gets treated like one.
When the cheaper basement assembly is the right one
A vapour barrier basement doesn’t need foam everywhere to pass. In clean, standard framing, a stud wall of batt with the vapour barrier sealed on the warm side is a legitimate wall, provided the moisture protection against the concrete follows 9.13.2.5 and the wall meets the energy package on your permit. Our batt page lists basement stud walls among its standard work, detailed so the assembly dries and doesn’t trap moisture. Batt is the lowest cost per square foot we install.
Where foam earns its price is the awkward part: the rim and header bays, old block or rubble walls that sheet goods can’t follow, and walls tight on floor area. It’s why we routinely foam the rim joists and problem areas and batt the rest. If a cheaper product will do the same job in your basement, we will tell you.
Where spray foam fits under and around the slab
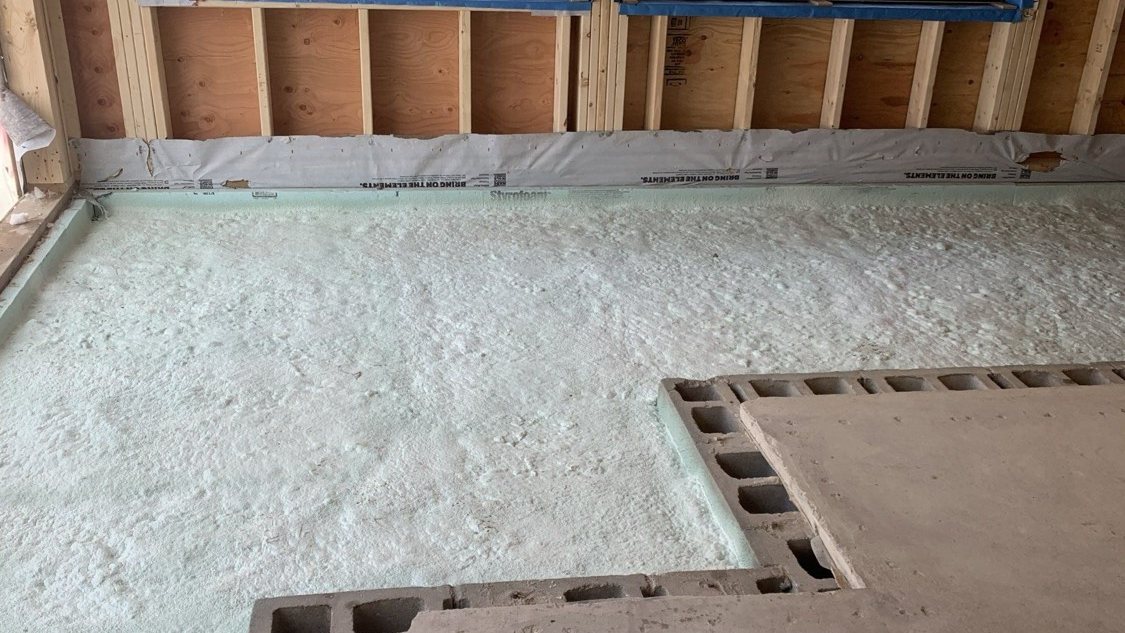
We also spray floors ahead of the pour. Our project gallery shows a basement floor insulated before the concrete went in, and a shop floor sprayed to a continuous, even surface before the pour.
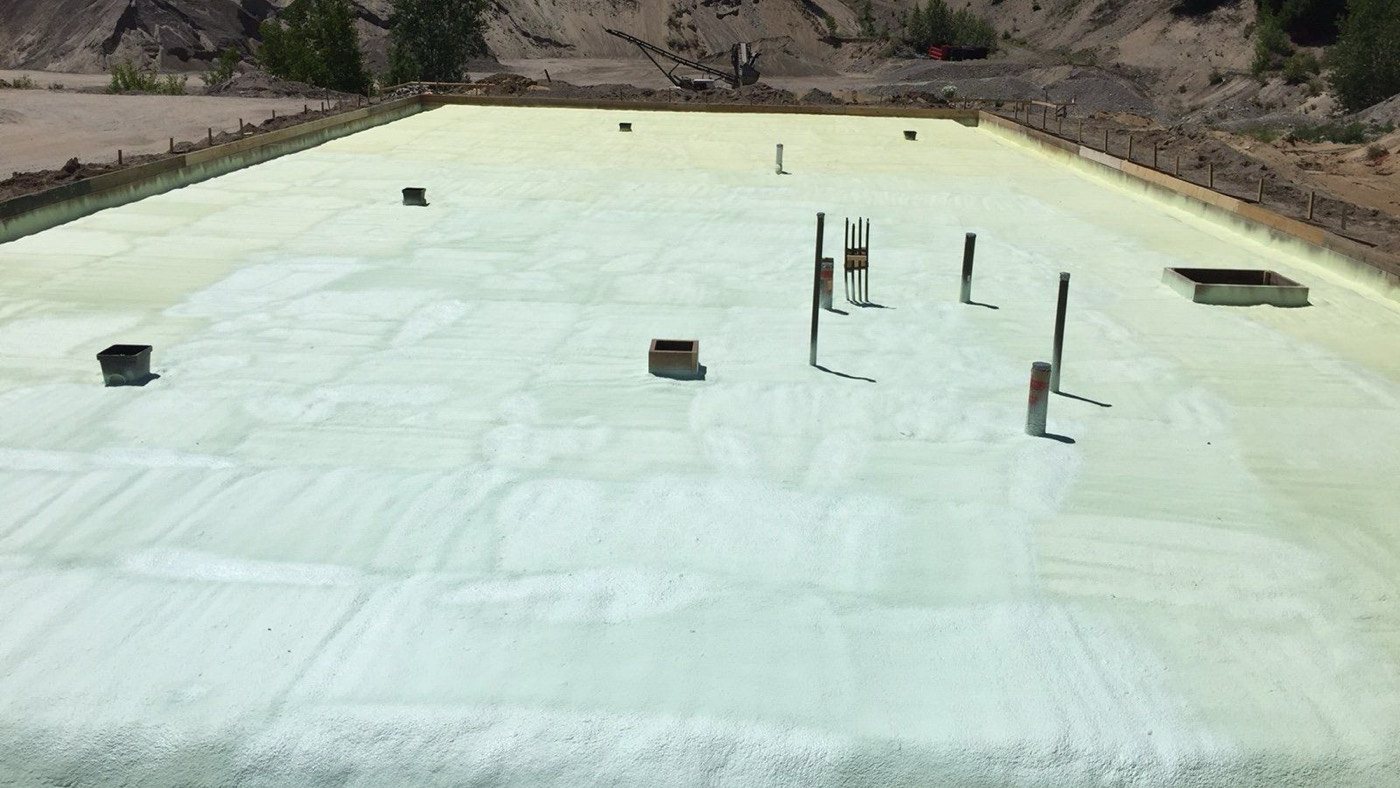
The product we spray is Polarfoam 7300-0 SOYA, a 2 lb closed-cell foam installed to CAN/ULC-S705.2. Our spray foam page lists it as insulation, air barrier and vapour retarder in one step, at roughly R-6 per inch, and says it can be applied to poured foundation and cinder block. Permeance figures come from the current manufacturer sheet. Two things to settle at permit rather than on pour day:
- What the inspector will accept as the soil gas barrier. Foam under a slab is insulation first. Whether your building department also takes it as the air barrier on the radon rough, or still wants the poly, is their call to make, in writing, before the crew is booked.
- Thermal barrier on exposed foam. In occupied space the code wants spray foam separated from the interior by an approved thermal barrier, usually drywall. Under a slab the concrete covers it. On a basement wall left unfinished for now, decide before the foam goes on. More in thermal barrier for spray foam.
Vapour barrier basement checklist: ready before the crew arrives
- Radon rough passed and the slab poured, with the perimeter joint sealed by the trade that owns it.
- Concrete given time to cure before anything covers the wall.
- A decision on the wall assembly, including which layer is the moisture protection under 9.13.2.5 and which is the vapour barrier. One of each, not two vapour barriers.
- Nothing low-perm on the concrete above grade between the insulation and the wall.
- Water problems fixed first. Insulation hides a wet wall. It doesn’t dry one.
- Rim and header bays reachable, before ducts, plumbing and ceiling finishes close them in.
- Penetrations through the rim made and sealed by the trade that made them: dryer vent, hose bibs, gas line, electrical service.
- Space cleared on spray day for the re-entry period we give you before we start.
Where we fit
We install spray foam, BIBS and batt, so a basement quote can be foam at the rim and header and batt in the stud walls, priced by area and product. On batt work the vapour barrier is detailed and sealed as required and left ready for the building inspector and the drywall crew. On foam work it’s applied in controlled lifts at documented thicknesses by certified applicators, trimmed, checked and left ready for the inspector and the next trade. We work through Springwater and the rest of Simcoe County from Barrie.
The under-slab sheet isn’t ours. It’s laid by whoever preps the floor for the pour, and it’s worth naming that trade in the schedule. What we can do is get the rest of the vapour barrier basement envelope right once the slab is in, and tell you plainly where batt and sealed poly will do. Stuck on the lap and tape details for the wall itself? See 6 mil poly vapour barrier.
Got a basement coming up to insulation and want the rim, the walls and the vapour barrier settled before inspection? Call (705) 812-1955 or request a free quote.